
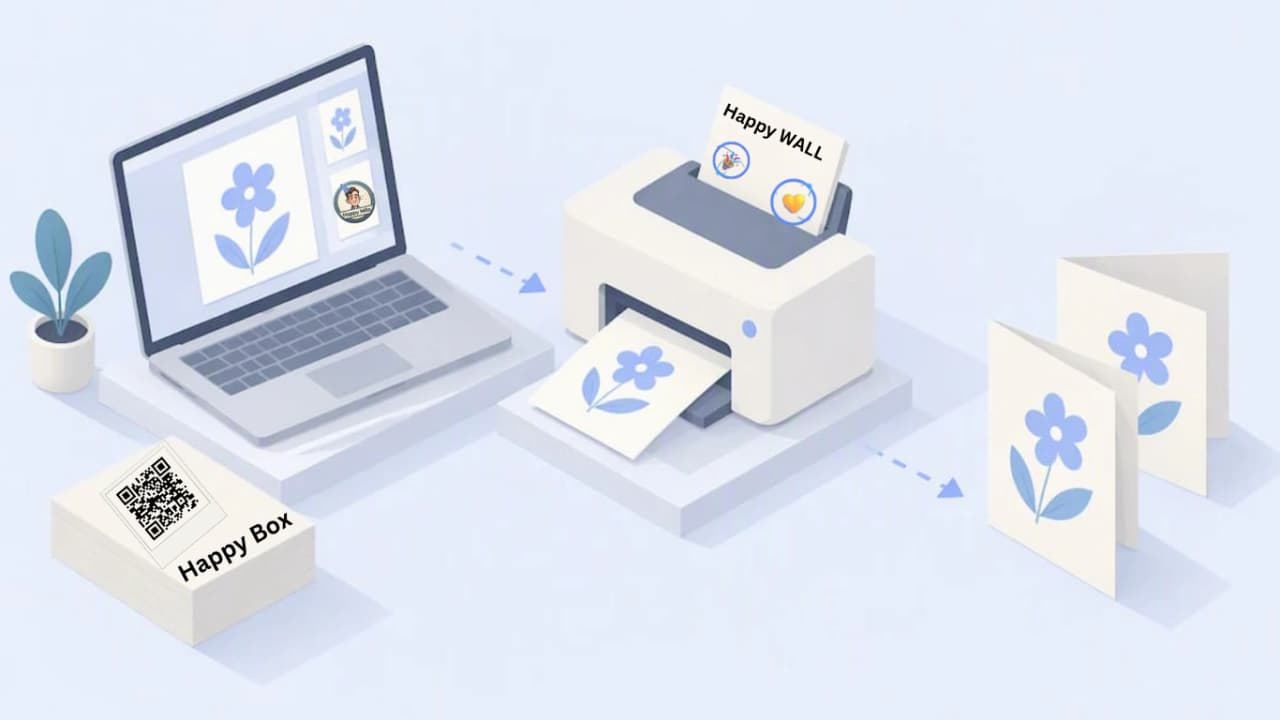

Yes, you can reliably print a physical card from a digital card. Export a high-resolution PDF, set your printer to “Actual Size” with the correct duplex and flip setting, and either run it at home, drop it at a local print shop, or send it to an online print service for a professional finish. Each route works best in different situations, and a quick checklist further down the page walks you through the settings that trip most people up.
How Do You Print From a Digital Card File?
Before anything touches paper, the file itself needs to be built for printing, not just for screens. The most common failure isn’t a bad printer; it’s a digital card file that was never meant to leave the screen in the first place.
File format matters more than people expect. A high-resolution PDF is the safest export choice because it locks in fonts, colors, and page dimensions the same way across devices. PNG or JPEG files work fine for a single flat card, but they can lose sharpness once you add a fold, a bleed, or text near the edges. If your digital card platform (including a Happy Wall you’re exporting from Happy Milo) offers a “download as PDF” option, take it over an image export every time.
Resolution is the next checkpoint. Aim for 300 DPI minimum. Anything lower and text or photos look soft or pixelated once printed at full size, even if they looked crisp on your phone. If you’re sending a file to a commercial press, ask whether they want PDF/X, a print-industry standard that locks color profiles and prevents last-minute font substitutions.
Paper choice changes the entire feel of the keepsake. For folded greeting cards, most home and shop printers work well with:
- Cardstock weight: a cardstock weight suitable for a sturdy, foldable card that doesn’t feel floppy.
- Standard sizes: A2 (4.25 by 5.5 in) or A7 (5 by 7 in) in the US; A5 or A6 in most of Europe.
- Finish: matte holds ink better for text-heavy designs, while satin or gloss makes photos pop.
You’ll also want a few inexpensive tools on hand if you’re finishing at home: a paper trimmer for clean edges, a bone folder for crisp creases, and a scoring tool if your cardstock is on the heavier side. None of these cost more than a few euros, and they make the difference between a card that looks handmade and one that looks store-bought.
Home Printer, Print Shop, or Online Service: Which Should You Use?
The right printing route depends on three things: how many copies you need, how much time you have, and how much the finish matters to you.
Home printing makes sense when you need one or two cards fast and you’re not fussy about premium paper. It’s the cheapest option and gives you full control, but most inkjets and laser printers struggle with heavier cardstock jams and can’t match a shop’s color consistency.
A local print shop is worth the trip when you want someone to catch mistakes before they become 50 wasted sheets. Shops typically offer proofing, heavier cardstock than your printer can handle, and staff who’ve solved duplex and trimming problems a hundred times before. Turnaround is usually same-day to a few days, and cost sits in the middle between home printing and premium online services.
Online print services shine when you want a professional finish, a wider range of paper and finish options, or you’re printing many copies at once. You lose the same-day option most of the time, since shipping adds days to the timeline, but you gain consistency across large batches.
Here’s a fast decision checklist:
- Need it today? Home printer.
- Need a color-critical proof or heavy cardstock? Local shop.
- Need a bulk run or specialty finish? Online service.
- Want a done-for-you keepsake with no printer, paper, or folding involved? A service that handles printing and shipping for you.
Pro Tip: Run one test print on plain paper before committing your good cardstock. It costs you a sheet and thirty seconds, and it catches ninety percent of scaling and margin problems before they become permanent.
How Do You Print a Folded Card Step by Step?
Folded cards fail most often at the layout stage, not the printing stage. Getting the 2-up arrangement and duplex settings right the first time saves you a stack of ruined cardstock.
- Export your file correctly. Set the page size to match your target paper, add bleed if your design has full-bleed color or photos, embed all fonts, and save as a high-resolution PDF.
- Build the 2-up or booklet layout. Most folded cards print as two panels on one sheet, folded down the middle. Acrobat’s print dialog, your printer driver’s “multiple pages per sheet” option, or a template file from your card platform can all handle this. If you want tighter margins and more control than a basic print-driver layout gives you, advanced tools like mkbooklet convert PDFs through PostScript to produce cleaner page scaling than the default multiple pages per sheet setting.
- Open the print dialog and check three things: page scaling should read “Actual Size” rather than “Fit,” duplex should be turned on, and the flip edge (long or short) should match your fold direction.
- No built-in duplex? Go manual. Print the odd-numbered pages first, flip the stack according to your printer’s feed direction, then reinsert and print the even pages. Test this on a single sheet before running your full batch.
- Trim, score, and fold. Trim any bleed edges with a paper cutter, score the fold line with a bone folder before creasing (this prevents cracking on heavier cardstock), then fold and press flat.
Getting duplex settings wrong is one of the most common reasons a folded card comes out with the back page upside down or offset, since Adobe notes that duplex printing often requires choosing “flip long edge” or “flip short edge” depending on your card’s orientation, and getting that one setting backward is enough to ruin an otherwise perfect layout.
Which Print Settings Actually Prevent Misprints?
Two settings cause more ruined prints than everything else combined: scaling and flip edge. Get those right and most other problems disappear on their own.
“Actual Size” versus “Fit to Page” sounds like a minor toggle, but the difference is visible immediately. Actual Size prints your document at the exact dimensions you designed, matching your card stock precisely. Fit to Page rescales the document to fill whatever paper is loaded, which often shrinks or stretches your layout and leaves oversized margins with tiny, hard-to-read text. For card printing, Adobe’s own guidance is to use Actual Size to avoid this kind of unwanted rescaling.
Flip long edge versus flip short edge determines whether your back panel lines up correctly after folding. As a simple rule: portrait-oriented folded cards typically need flip on the short edge, while landscape-oriented cards usually need flip on the long edge. When in doubt, test one sheet first.

Font embedding matters more than most people realize. If you skip it, a print shop’s software may substitute a similar-looking font for one it doesn’t have installed, quietly changing your card’s entire look. Exporting as PDF/X or a high-quality print preset embeds fonts automatically and avoids the swap.
Save your settings once you get them right. Print presets bundle scale, duplex, and paper size into one click you can reuse, and Adobe specifically recommends saving and reusing print presets to keep repeat print jobs consistent instead of resetting everything by hand each time.
Pro Tip: Name your saved preset something specific, like “5x7 Folded Card, Short Edge,” instead of leaving it as “Preset 1.” You’ll thank yourself the next time you print a card six months from now and can’t remember what worked.
Why Did My Card Print Wrong, and How Do You Fix It?
Most printing failures trace back to one of four causes, and each has a fast fix.
Run this checklist before you reprint anything:
- Confirm the image resolution is 300 DPI or higher.
- Confirm scaling is set to Actual Size, not Fit to Page.
- Confirm the paper size selected in the print dialog matches what’s loaded in the tray.
- Check margins in print preview before sending the job.
- Look at the print preview one more time. It catches most layout errors before they waste paper.
Color looks off compared to your screen. Home inkjets tend to oversaturate reds and skew warm tones, especially on matte cardstock. If color accuracy matters (a wedding invitation, a branded card), order a physical proof from a print shop or online service before committing to a full run.
The back panel is upside down or shifted. This is almost always a flip-edge mismatch. Reprint a single test sheet, switch the flip edge setting, and check again before running your full batch.
Text or photos look blurry. This usually means the source image was under 300 DPI to begin with. Re-export from the original file at a higher resolution rather than trying to stretch a small image up, which only makes the blur worse.
How Happy Milo Turns Your Digital Card Into a Printable Keepsake
A Happy Wall collects unlimited messages, photos, and wishes from a group, and once the wall closes, it becomes something you can genuinely hold. Happy Milo’s founder, Milo, has documented the export and preparation process directly in the platform’s step-by-step guide to creating a Happy Wall, which walks through gathering contributions before the moment arrives.
The companion guide on making a Happy Wall work covers timing and collection tips that matter most before export: the more complete the wall is when it closes, the cleaner the printable file turns out. Additional tools help groups count down together, suggest places to celebrate in person, and keep the planning on track so a wall actually gets opened and closed on time.
Once your wall is ready, the platform gives you two paths: download the printable file yourself and follow the DIY steps above, or skip the paper-and-printer part entirely and use a service to assemble it for you.
Order a Printed Keepsake Instead of DIY-Printing It Yourself
If the export-and-fold process above sounds like more effort than you want to spend, Happy Milo’s Happy Box options skip the printer entirely. Happy Box DIY, priced at €8.00 one-off, gives you a print-ready PDF export of your Happy Wall so you can handle the printing and assembly yourself using everything covered in this guide. Happy Box Premium, at €16.90 one-off, takes it further: Happy Milo assembles and finishes the printed keepsake professionally and ships it, so there’s no cardstock, trimmer, or duplex setting to worry about.

Both options start the same way: creating a Happy Wall and collecting messages from your group. If you want your wall to stay accessible permanently rather than closing after a set window, that’s a separate €2.99 one-off add-on on top of either print option. Pricing and delivery follow standard EU format, with shipping handled from within Europe.
If color accuracy or paper feel matters to you, the same rule from the print-shop section applies here too: when in doubt, order a proof before committing to a full print run. To get started, head to the Happy Wall page, build your group card, and choose your printed keepsake once it’s ready to close.

Where to Find More Print Templates and Technical Guidance
For the technical details covered above, these are the primary sources worth bookmarking:
- Adobe’s page-size and duplex printing documentation for reliable Actual Size and flip-edge settings.
- mkbooklet for advanced 2-up booklet scripting beyond basic print-driver layouts.
- Avery’s card design and print tools for pre-cut sheet templates.
- QR Code Generator’s guidance on printing gift cards if you’re printing a card that needs to stay scannable after printing.
Sources
- Set up and print PDFs — page size (Adobe HelpX)
- Can you print a gift card with a QR code? (QR Code Generator blog)
- Making 2up booklets from PDF / PS / DVI files (Gautam/GCMU)
FAQ
How Do I Print a Card From a PDF?
Open the PDF in Acrobat or your default PDF reader, go to File > Print, and set scaling to “Actual Size” rather than “Fit to Page.” Choose your paper size, turn on duplex if the card is folded, and select the correct flip edge (long or short) before printing, following Adobe’s page-size printing guidance.
Can I Print on Cardstock Using a Normal Home Printer?
Most inkjet and laser printers handle standard cardstock without issue, though heavier stock can jam in some models. Check your printer’s manual for its maximum supported paper weight, and always run a single test sheet before printing a full batch.
Can I Print an E-Gift Card and Give It to Someone?
Yes, but the printed version must preserve any scannable code or redemption instructions exactly as they appear digitally. Confirm the issuer’s redemption policy first, since some QR-code gift cards require the code to stay fully intact and unobstructed to remain scannable after printing.
How Do I Print Out My Own Digital Card?
Export your card as a high-resolution PDF (300 DPI minimum), then print it at home with Actual Size scaling and the correct duplex flip edge, or send the file to a local shop or online print service for a finished result. If your card started as a Happy Wall on Happy Milo, you can download a printable file directly through Happy Box DIY or order an assembled keepsake through Happy Box Premium at the pricing page.
What’s the Difference Between Happy Box DIY and Happy Box Premium?
Happy Box DIY, priced at €8.00 one-off, gives you a printable PDF export to print and assemble yourself. Happy Box Premium, priced at €16.90 one-off, has Happy Milo handle the printing, assembly, and shipping for you.